How to Run a School Spirit Wear Sale: A PTO and PTG Guide
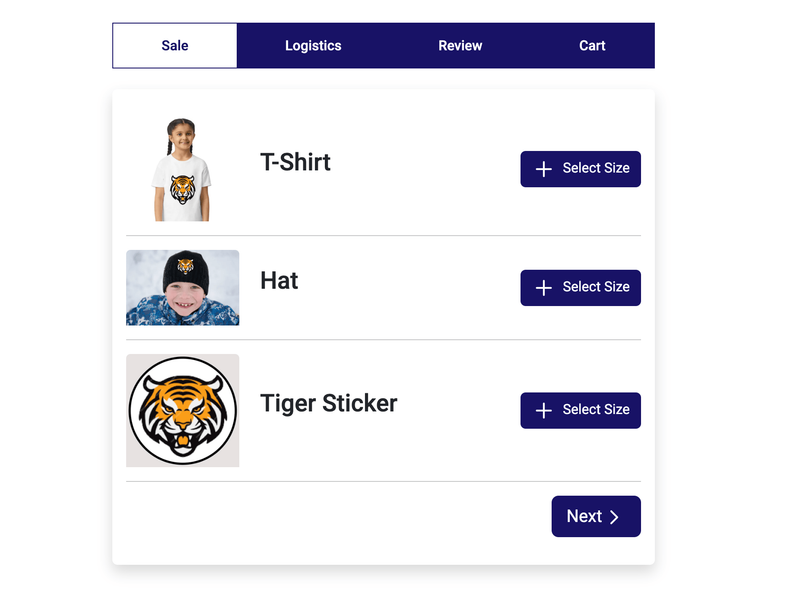
A spirit wear sale gives families a way to show their school pride while supporting your PTO or PTG. The most useful decision comes before you pick a shirt: are you trying to put school shirts on as many people as possible, or raise money? That answer should guide your products, prices, and expectations.
1. Choose between affordable school spirit and fundraising profit
Most spirit wear sales lean toward one of two approaches:
- Affordable shirts and broad participation. Choose a comfortable, economical shirt and keep the price close to your full cost. You leave less profit on each item, but make it easier for more families to buy one. This is the approach I prefer when the main goal is school spirit.
- Higher-priced shirts and a larger margin. Choose apparel families will value and price it to leave a meaningful amount for school programs. Expect fewer purchases at higher prices. If this is primarily a fundraiser, this is usually the better starting point, provided your community is willing to pay the price.
You can combine them: offer an affordable student T-shirt alongside a premium adult shirt or hoodie with a larger margin. Keep the choices manageable, and explain what any fundraising proceeds will support.
A more expensive shirt does not automatically produce more profit. Compare the selling price with the garment, printing, fees, and other costs before deciding.
2. Find a printer and get a complete quote
I prefer local printers because it keeps more of the money in the community. It also gives your group a nearby person to work with on samples, artwork, and problems with an order.
Ask for a written quote covering:
- Garment brands, styles, colors, and available youth and adult sizes.
- Prices at several order quantities and how different styles count toward minimums.
- Artwork, setup, printing, delivery, and any applicable taxes.
- Extra charges for larger sizes, additional ink colors, or a second print location.
- Production time after the final order and artwork are approved.
- The process for misprints, missing items, and small replacement orders.
Ask whether the printer can supply samples and size charts before the sale. A cheaper shirt is not much of a bargain if families dislike the fit or fabric.
3. Keep the design and product selection simple
For a first sale, start with one design on the front and one ink color. With screen printing, printing on both sides and using multiple colors can get costly. Ask the printer to price those additions separately so you can see what each one adds.
Use your school’s approved logo, your parent group’s logo, or an original mascot design. Ask the printer whether they have a graphic designer who can turn your idea into print-ready artwork, and whether that work is included in the quote. Save the final files so the design can be reused next year.
I sometimes use ChatGPT to make an early mockup of someone wearing a shirt. That can help show the idea, but have the printer confirm the actual artwork, print size, placement, and garment color before using the image to take orders. Label a mockup as a preview and avoid showing details the printer cannot reproduce.
For the products themselves:
- T-shirts and hoodies are a useful starting point and tend to be popular.
- Long-sleeve T-shirts and crewneck sweatshirts can round out the selection if there is demand.
- Beanies need their own quote. Check decoration costs and minimum quantities before adding them.
I usually favor higher-quality shirts for adults. Kids outgrow theirs, while adults may wear the same school shirt for years. That does not mean buying uncomfortable children’s shirts; it means spending the budget where families will get the most use from it.
4. Compare your own order page with a printer-run store
Many printers offer an online store where families order directly. Ask what that convenience costs and who handles payments, sorting, delivery, and corrections. The price may include a portal or service markup rather than a separate fee.
Compare the same garment and design in both quotes. For illustration, a 10% to 15% portal markup would add $1.20 to $1.80 to a $12 item before other charges. That range is an example to help compare quotes, not a standard fee every printer charges.
If you already have a Big Nest site, your school storefront can be the online order portal for your community. Collect sizes, orders, and payments there, then send one combined order to your chosen printer. Avoiding a printer’s portal markup can leave room for lower family prices or more fundraising profit. Include your own payment-processing costs in the comparison, and plan for your volunteers to manage distribution.
Larger combined orders can also reduce the printing cost per item. Confirm the quantity breaks with your printer rather than assuming every style qualifies for the same discount.
5. Check sales tax before setting final prices
Being a 501(c)(3) does not automatically let your group sell spirit wear without collecting sales tax. State rules determine whether your organization and this particular sale qualify for an exemption. Confirm the requirements with your state revenue department or a tax professional.
Washington example: a fundraiser versus an ongoing store
Washington provides a sales-tax exemption for qualifying nonprofit fundraising sales. Its Department of Revenue gives a three-week fall spirit wear sale raising money for school sporting equipment as an example. The proceeds must support the nonprofit’s goals beyond paying for the sale itself. See the Washington guidance for school-group sales.
A store open all year should not be treated as an exempt fundraiser simply because a nonprofit runs it. Washington excludes regular business operations from the fundraising exemption; its nonprofit tax rule illustrates this with year-round catalog orders. An ongoing spirit wear store generally requires collecting and remitting sales tax unless another exemption applies. A short ordering window alone does not establish eligibility.
The seller matters, too. When families buy directly from a commercial printer and your group receives a commission, Washington generally requires the business to collect sales tax. A qualifying sale made by your nonprofit may therefore have a lower checkout total. Confirm who is selling the goods, any resale paperwork needed for your printer order, and any buyer use-tax obligations. Using Big Nest or another website does not itself create an exemption.
6. Build extra shirts into your pricing
Always budget for extras. Shirts get lost, parents select the wrong size or style, and an occasional order needs fixing. My starting point is about two extras in each of the most popular sizes, focused on the styles families buy most often. Use last year’s orders or this sale’s preorder counts to choose the sizes.
Include those extras in your prices before you launch. Do not depend on selling them later to break even.
For example, suppose you expect 100 paid T-shirt orders at a printer cost of $10 each. If you buy 110 shirts, including 10 extras, your garment and printing bill is $1,100. Spread that over the 100 paid orders: $11 per sold shirt, before setup, delivery, payment fees, applicable taxes, and your intended profit.
Run this calculation separately for products with different costs. Keep a record of the extras used for exchanges or replacements and the inventory left afterward.
7. Take orders for about two weeks, then submit the batch
A two-week preorder window gives families time to buy while giving the printer a firm point to begin production. Work backward from the delivery date you want, allowing time for printing, checking the shipment, and sorting orders.
Before opening the sale, put these details on the order page:
- Product images, garment descriptions, and size charts, with youth and adult sizes clearly separated.
- Prices, the order deadline, and the expected delivery or pickup window.
- How families will receive their items and whom to contact with a problem.
- Your exchange policy, including that spare sizes are limited.
Collect payment with the order. If shirts will go home through classrooms, collect the student and teacher details needed for delivery. Share the link through your usual school communication channels, then send a reminder before orders close.
After the deadline, total quantities by style, color, and size, add your extras, and check that the printer’s confirmation matches. Approve the final artwork and delivery schedule before production begins.
A real example: Hutton’s fall spirit wear order
When I put together Hutton’s fall order, it was about 240 items, including extras. Sales brought in roughly $5,000, with an expected cost of $3,000. That leaves an estimated $2,000 difference before any expenses outside that cost estimate; it is not a finalized net-profit figure.
Hutton has about 500 students, so this is a larger-school example, not a target every group should expect to match. My takeaway was that we could probably lower prices next time to make the shirts more affordable. A sale can bring in money and still reveal that broader participation should be the next priority.
8. Distribute the orders and leave notes for next year
Count the shipment against the printer’s invoice before sorting it. Set extras aside, pack each family’s order, and label it with the information needed for pickup or classroom delivery. Keep a list of orders still waiting to be collected and resolve missing or incorrect items with the printer promptly.
Once distribution is finished, save the approved artwork, garment details, printer contact, prices, quantities by size, extra inventory, final costs, and net proceeds. Add a few useful notes: which shirts fit well, which sizes needed exchanges, whether prices felt affordable, and how long production actually took.
Those details give the next spirit wear chair a sale they can improve instead of a project they have to figure out from scratch.