How to Set Up a Stripe Account
When it comes to handling payments for your Parent Teacher Group, it’s essential to have a reliable, user-friendly payment processor. That’s where Stripe comes in.
Stripe allows your organization to accept money online. Stripe charges a small fee per transaction (typically a few cents per dollar). This is a standard approach for online payment processors. If you’re using Big Nest, you’ll be able to recoup any processing fees by encouraging a microdonation at checkout.
Let’s dive in.
Step 1: Gather Your Information
Before you start setting up your Stripe account, it’s a good idea to gather all the important details you’ll need. This will speed up the setup process. You’ll need information in three main areas:
PTG Information
- Email Address: Use an official email associated with your group, like “WashingtonPTO@gmail.com.”
- Legal Entity Name: This is the official name of your Parent Teacher Group as it appears in any formal documents.
- Address of PTG: The mailing address for your organization.
- Employer Identification Number (EIN): This is your PTG’s federal tax ID number.
PTG Representative Information
- Name: Typically, this is the president or treasurer of your group.
- Phone Number: Contact number for the representative.
- Social Security Number (SSN): Stripe requires the last 4 digits of your SSN in order to comply with financial regulations.
Bank Information
- Routing Number: This is the nine-digit number identifying your bank.
- Account Number: The specific account where you want Stripe to deposit funds.
Step 2: Basic Account Setup
Now, it’s time to kick things off. Don’t worry about being a tech expert; Stripe is designed to be user-friendly and takes you through everything you need to know.
To get started, head over to Stripe’s website. You should see a button for starting your account. If you don’t see it, just navigate to https://dashboard.stripe.com/register.
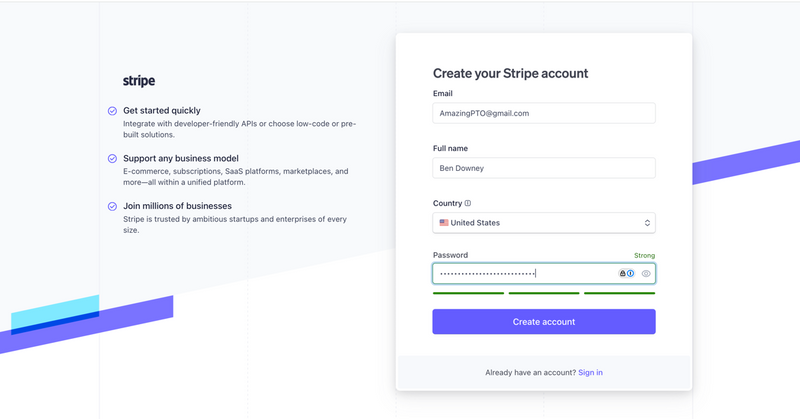
Here, you’ll see a web form. Enter the email associated with your organization (e.g., “RooseveltPTO@gmail.com” or “JeffersonPTGTreasurer@gmail.com”) and related information.
Once you’ve created an account, Stripe will send you an email to confirm your email account is legitimate. Open that email and click on the verification link.
Step 3: Add Your Business Details
This is the meaty part of the account setup process.
After verifying your email, Stripe will take you to a page that looks like this. Click the button that says “Activate Payments.” That should take you here: https://dashboard.stripe.com/account/onboarding.
You’ll enter information about your parent teacher organization, your organization’s representative, and your banking info.
First, you’ll be asked about what type of business you run. You can select “nonprofit”.
Next, it’s on to the Business Details.
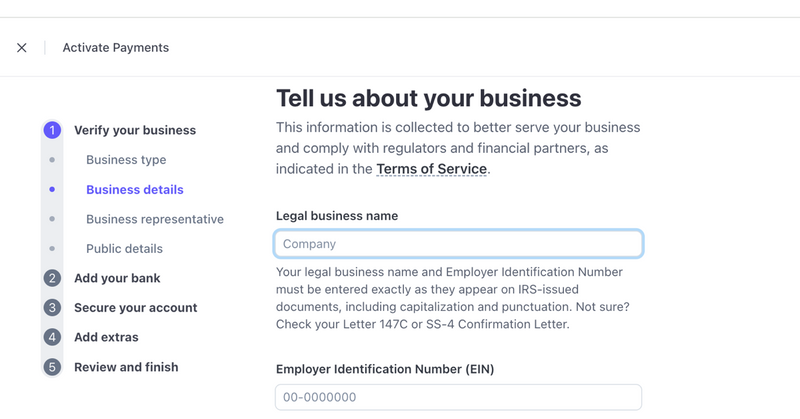
When asked your industry, select “Education > Primary and Secondary School.”
As a product description, you can enter something along the lines of this:
Next, you’ll enter information about your organization’s representative (if you’re reading this, it’s probably you). They ask for some personal information, like the last few digits of your social security number. Don’t be alarmed. Financial Services companies are required to make sure they know their customers—this is part of some post-9/11 legislation. Essentially, Stripe wants to avoid accidentally facilitating a bake sale for Al-Qaeda.
Step 4: Link Your Bank Account
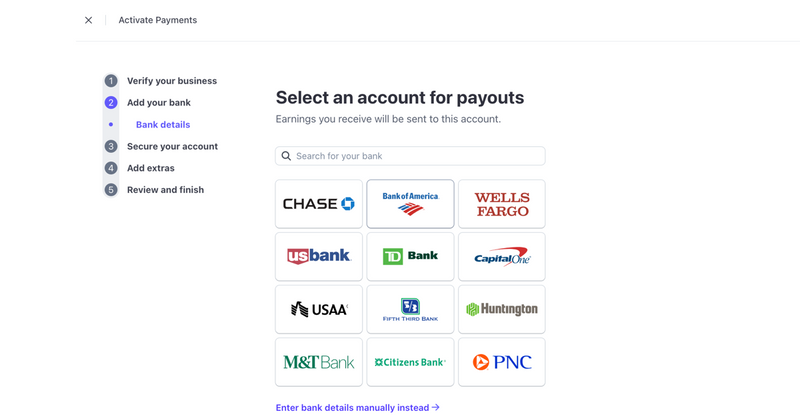
To receive funds from Stripe, you’ll need to link your bank account. Stripe will walk you through entering your account number and routing number.
Remember that you should provide the bank account of your parent teacher organization—not your personal bank account.
Step 5: Set Up Payments for Big Nest
With your account set up, you can now connect Stripe to your Big Nest account. By linking Stripe, you can collect donations, event fees, and store sales seamlessly. When someone donates or buys something, Stripe processes the payment and deposits the funds directly into your account.
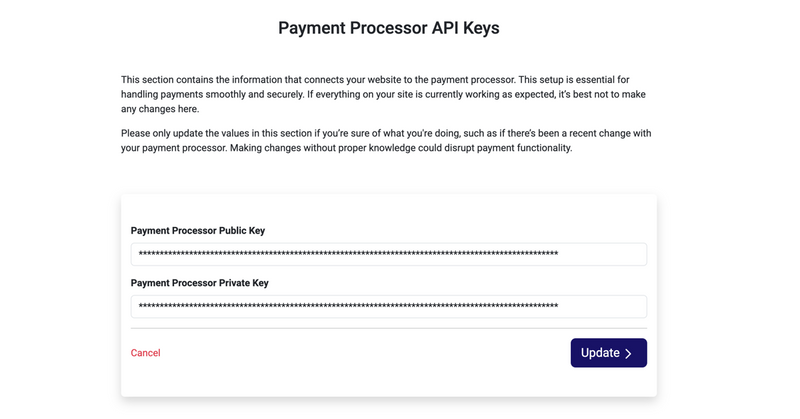
Head to https://dashboard.stripe.com/apikeys and copy the public key and private key. Note: you only get to see the private key once, for security reasons, so reveal it, copy it, and then immediately paste it into Big Nest.
On your Big Nest site, scroll down to the Financials section of the Admin Dashboard. Click on “Financial Metrics” and scroll all the way to the bottom.
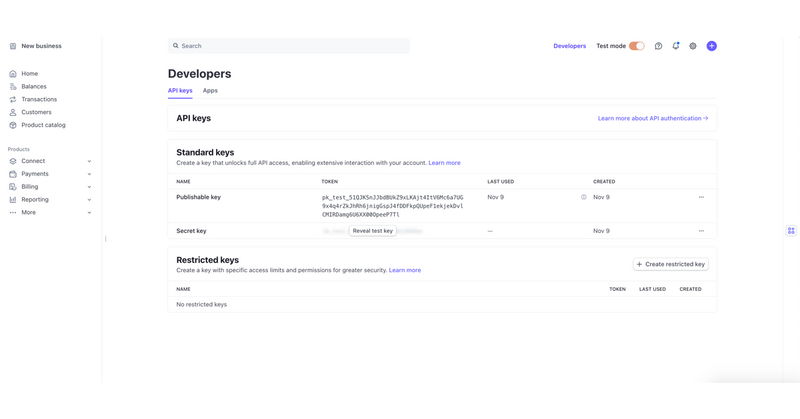
Congratulations! You can securely upload both the public key and private key.
Step 6: Test It Out
Once everything’s set up, try making a small donation to see how the payment process works from a parent’s perspective. This step isn’t required, but it can help you feel more confident about the system and ready for real transactions.
Final Thoughts
Setting up your Stripe account is a crucial step in making payments easy and secure for your Parent Teacher Group. With Big Nest’s integration, you’re all set to collect funds that support your school community.
So take a few minutes today, follow these steps, and get your Stripe account up and running. You’ll be ready to accept payments with ease!
Happy fundraising! If you need any more guidance, reach out.
