How to Collect and Send Parent Emails in Big Nest
Many parent groups use one tool to gather email addresses, another to store them, and yet another to send messages. It works, but it’s easy for contacts to get lost or lists to go out of date.
Big Nest combines the collection and sending process in one place. This guide walks you through how to set it up and start using it.
Choose How You’ll Collect Emails
You can add contacts in Big Nest in two main ways: (1) Sign-Up Form or (2) Family Directory Onboarding.
Option 1: Quick Sign-Up Form
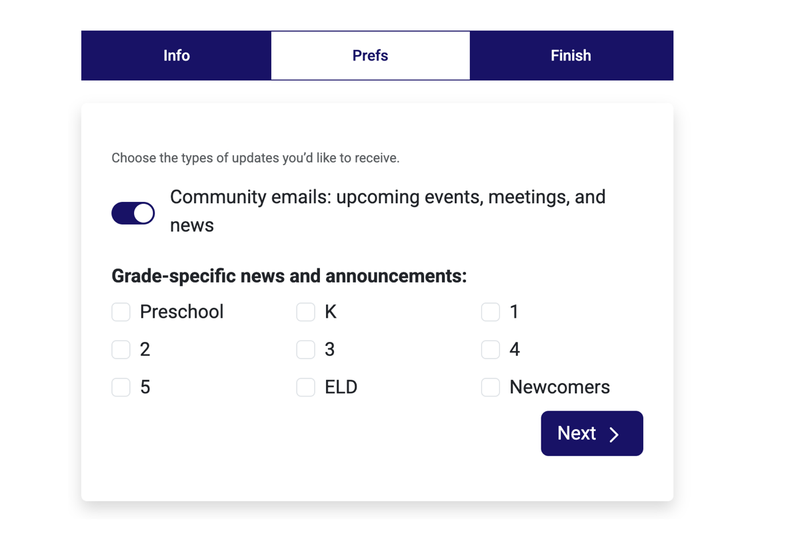
Every Big Nest site includes a built-in sign-up form, usually on your homepage. Parents enter their name, email, and select the types of updates they want.
- General community news
- Grade-specific announcements
- Volunteer opportunities
It’s a basic form and parents can signup within a few seconds.

Option 2: Family Directory Onboarding
If you maintain a school directory, the onboarding form collects:
- Contact details for both guardians
- Student information (grade, teacher)
- Each guardian’s communication preferences
This method builds your contact list and updates the directory in one step.
Both options feed into the same centralized list, which updates automatically as families join or change their preferences.
Send Your First Email
Once you have contacts in your dashboard:
-
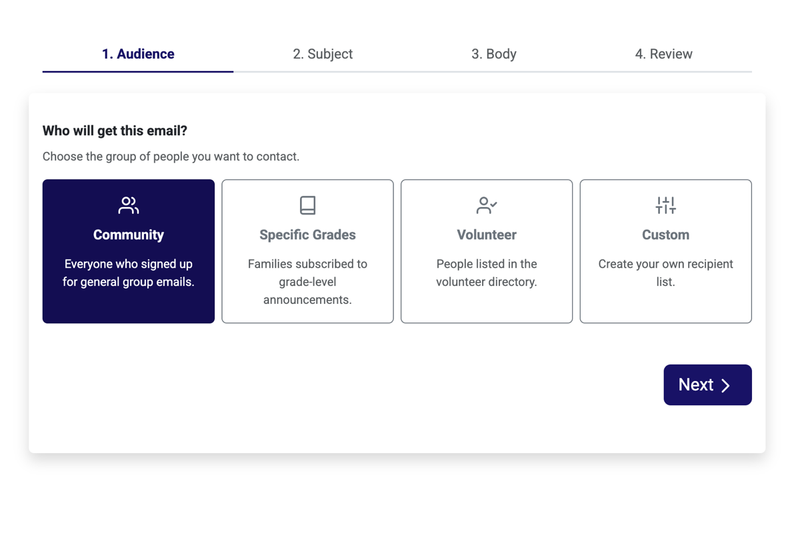
Select your audience Choose the whole community, specific grades, volunteer lists, or a custom group.
-
Add a subject and teaser The teaser appears in inbox previews—keep it short and engaging.
-
Write your message Use the built-in editor to format text, add links, and attach files.
-
Review and send Double-check your list and content, then send immediately or save as a draft.

Tip: Your emails will automatically includes an unsubscribe link. That’s not just convenient. It also helps you comply with the CAN-SPAM Act, which requires bulk or promotional emails to give recipients a clear way to opt out. Most school groups that use ad-hoc setups (Google Forms + Gmail, for example) don’t have this built in.
You’ve got Options
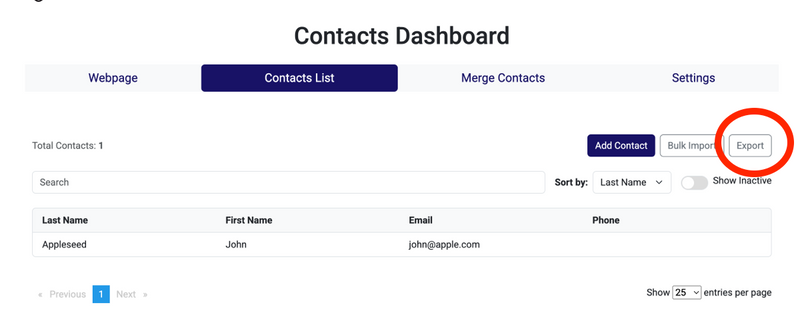
If you prefer to send emails through another tool like Gmail or Mailchimp, you can export your contact list anytime as a clean CSV file.

Step 4 — Keep It Up to Date
As families update their information through the sign-up form or directory, your list in Big Nest updates automatically. You don’t need to manually merge spreadsheets or re-import contacts.
All you emails get sent with an unsubscribe link, so that when families age out of your school, they can simple unsubsribe from future emails.
Summary
Keeping parents informed shouldn’t require duct-taping a bunch of tools together. Big Nest brings everything into one place so you can:
- Collect emails without extra steps
- Stay compliant with unsubscribe links
- Send targeted messages that get read
Whether you’re planning a fundraiser or rallying volunteers, the tools are here to help you do it faster and better.
